Saturday, September 26, 2009

Artisan bread in 5 minutes? Really?

YES! Really! I am so excited about this recipe. I was surfing around on THL a couple nights ago and saw a few references about a recipe for 5 Minute Artisan Bread. So that lead me to looking around on the net to see what I could find. Well, it wasn't hard to find. I was so happy to find the recipe and see exactly how easy it is!

I am in love with this recipe! No kneading, just a few ingredients and a quick cook time and BOOM! you have some awesome tasting bread! I have to admit that I ended up making to loaves. The first one I made for dinner. Maggie and I sat and smelled it for about 20 minutes and we couldn't help ourselves. We ate it. The whole thing! To our defense it was a SMALL loaf! LOL The second loaf turned out as good as the first.

Here is a pic of the dough. It had set for 2 hours
Photobucket


I misunderstood the directions that I read and put a ton of cornmeal under and around the loaf. Luckily I removed it prior to baking! What a stinky mess that would have been!
Photobucket

And the masterpiece! Loaf #1
Photobucket

Here is a shot of the inside. A little loaf of heaven!
Photobucket

If you are interested in the recipe, here it is!


5 Minute Artisan Bread


Adapted from “Artisan Bread in Five Minutes a Day,” by Jeff Hertzberg and Zoë François (Thomas Dunne Books, 2007)

1 1/2 tablespoons yeast

1 1/2 tablespoons kosher salt

6 1/2 cups unbleached, all-purpose flour, more for dusting dough

Cornmeal.

1. In a large bowl or plastic container, mix yeast and salt into 3 cups lukewarm water (about 100 degrees). Stir in flour, mixing until there are no dry patches. Dough will be quite loose. Cover, but not with an airtight lid. Let dough rise at room temperature 2 hours (or up to 5 hours).

2. Bake at this point or refrigerate, covered, for as long as two weeks. When ready to bake, sprinkle a little flour on dough and cut off a grapefruit-size piece with serrated knife. Turn dough in hands to lightly stretch surface, creating a rounded top and a lumpy bottom. Put dough on pizza peel sprinkled with cornmeal; let rest 40 minutes. Repeat with remaining dough or refrigerate it.

3. Place broiler pan on bottom of oven. Place baking stone on middle rack and turn oven to 450 degrees; heat stone at that temperature for 20 minutes.

4. Dust dough with flour, slash top with serrated or very sharp knife three times. Slide onto stone. Pour one cup hot water into broiler pan and shut oven quickly to trap steam. Bake until well browned, about 30 minutes. Cool completely.

Yield: 4 loaves.


I have a few baking stones, but since we moved I can't find them. I just used a regular baking sheet, upside down. It was very easy to get off with a spatula. So if you don't have a baking stone, or a pizza peel, etc., this bread is still very easy to make and handle without it.
If you try this recipe, let me know! I want to know how others like it. We absolutely love it. I like it so much I think I am going to order their book!

Friday, September 25, 2009

Our little urban homestead!

This past week has been so busy for us! Good busy! We have had so many learning opportunities and so much fun!

For starters, on Monday we started our winter garden. We planted carrots, lettuce, onions, leeks, swiss chard, brussel sprouts and radish. When we moved in here there was already a bunch of raised boxes so we just had to dig up the dirt, add more fresh dirt, chicken manure and some minerals to the boxes. We have more planting to do. We want to add garlic and potatoes. Now, we could have went hog wild and planted a lot more than we did, but we have so many critters around here and unsure of the dirt, so we are testing the waters right now. If these crops do well, well, next planting season will be crazy fun!
I will have to post pictures on that later. I don't think I have taken any yet!


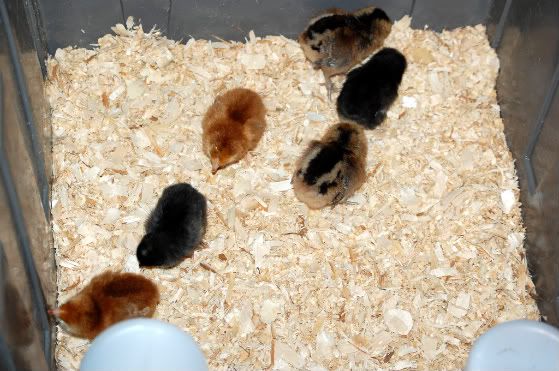
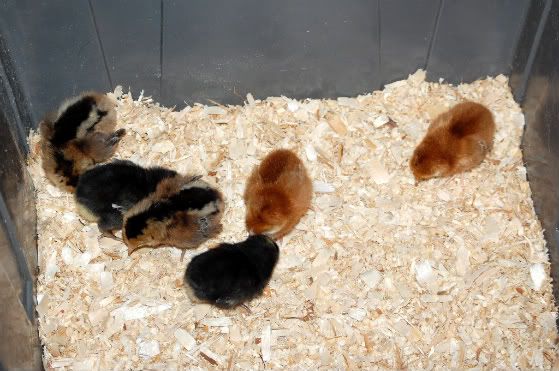
And, the newest and most fun is.......we bought 6 baby chickens! That means fresh eggs in a few months. I can not wait! These little perfect fuzzy creatures are so incredibly cute! We got 2 Rhode Island Reds, 2 Ameraucana and 2 Barred Rocks. I can't tell you the conversation topics that have come since bringing our newest family members home. From "what do chickens wear" to "do chickens wear jewlrey" to "how were the chickens made".

Maggie one chick of her very own. She named it Dora. We have one RIR that we named Mary Virginia. The others are waiting for names. If anyone has any suggestions, please, let us know! And no, we will not be naming them shake or bake. Or Kung Pau or Marsala. LOL

Here are our new babies!
Photobucket

Photobucket

I plan on getting individual pictures soon! They are so stinkin' cute!

We are also building a chicken coop, so there will soon be pictures of that process too! Maggie wants to paint it pink. She is having a hard time convincing her daddy of that. I don't really want a pink henhouse, but I have a feeling it just might end up pink!

Saturday, September 19, 2009

Shiver me timbers, pirate day be upon us!!!

What a fun day! International Talk Like A Pirate Day started in 1995 as a joke between two friends, John Baur (Ol' Chumbucket) and Mark Summers, (Cap'n Slappy), of Albany, Oregon. What started out as a joke between two friends became a fun day for everyone!

So to "celebrate" ITLAPD we are going to watch The Pirates Who Don't Do Anything.

And, just for fun I changed my language on Facebook to Pirate :)

Have a fun day!

Wednesday, September 16, 2009

Gymnastics!

As you already know, Maggie started gymnastics last week. She is just so happy and excited to "go to gymnastic school". She is having a blast! We have decided to take her twice a week instead of one. She is thrilled.

We had a really neat thing happen while we were there yesterday. Maggie was making friends with a little girl who just turned 4. I got to talking with the girls grandmother (who she lives with) and found out she lives pretty close by to our home. The conversation kept going and come to find out the lady bought my aunt and uncles old home which also happens to be the last house my dad ever built. Such memories started flooding my mind. My poor uncle passed away unexpectedly and far too soon a few years after moving into the house. He was one of those really neat people that you never forget. Thinking about him and the times we spent as a family visiting while the house was being built brought a smile to my face. Maggie was pretty excited and thinking her Papa was even cooler for building a house!

I get sidetracked to easily! Back to gymnastics! Maggie did well. Did a little of the same stuff from last week but some new things too. She balanced on the 2nd biggest beam yesterday. She just glided on as if she had been on it before. I was surprised to hear later that she was scared, I never would have known. I really hope that this is something she will enjoy for a long time!
I am also hoping it helps the girl with her coordination! She takes after here mama....and that's all I have to say about that!

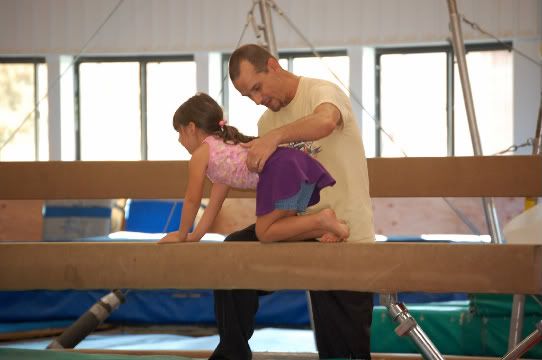
I am thrilled to say that I finally got pictures! Here is my girler!

I wish this one was focused better :(
Photobucket
Photobucket
Photobucket
Photobucket

Learning to Mount on the 2nd beam
Photobucket
Photobucket


Proud mommy moment :)

She is balancing great, learning cartwheels and having the time of her life.

Tuesday, September 15, 2009

My husband and I have been making this broth now for about 3 years. It is absolutely delicious! Not only does it taste yummy, but your house smells SO good while it is cooking. We usually end up cooking it about 18 hours or so. The longer you cook it (within reason!) the better it is. I started drinking a cup in the mornings before work (while I was working) and it filled me up until lunch time. I'm a huge snacker so this is a huge plus for me! It is super simple, pretty much cooks itself. We will never use store bought again. It freezes well and is nice to have on hand. Its also great for colds and flu's! There is more written about the broth and other brother recipes at Weston A Price Foundation

Enjoy!


Chicken Stock
1 whole free-range chicken or 2 to 3 pounds of bony chicken parts, such as necks, backs, breastbones and wings*
gizzards from one chicken (optional)
2-4 chicken feet (optional)
4 quarts cold filtered water
2 tablespoons vinegar
1 large onion, coarsely chopped
2 carrots, peeled and coarsely chopped
3 celery stalks, coarsely chopped
1 bunch parsley

*Note: Farm-raised, free-range chickens give the best results. Many battery-raised chickens will not produce stock that gels.

If you are using a whole chicken, cut off the wings and remove the neck, fat glands and the gizzards from the cavity. Cut chicken parts into several pieces. (If you are using a whole chicken, remove the neck and wings and cut them into several pieces.) Place chicken or chicken pieces in a large stainless steel pot with water, vinegar and all vegetables except parsley. Let stand 30 minutes to 1 hour. Bring to a boil, and remove scum that rises to the top. Reduce heat, cover and simmer for 6 to 8 hours. The longer you cook the stock, the richer and more flavorful it will be. About 10 minutes before finishing the stock, add parsley. This will impart additional mineral ions to the broth.

Remove whole chicken or pieces with a slotted spoon. If you are using a whole chicken, let cool and remove chicken meat from the carcass. Reserve for other uses, such as chicken salads, enchiladas, sandwiches or curries. Strain the stock into a large bowl and reserve in your refrigerator until the fat rises to the top and congeals. Skim off this fat and reserve the stock in covered containers in your refrigerator or freezer.
Print

LinkWithin

Related Posts with Thumbnails